Course Tour
Select a hole to explore it in more detail or simply scroll down to browse through the course.


Hole #1
Par 4
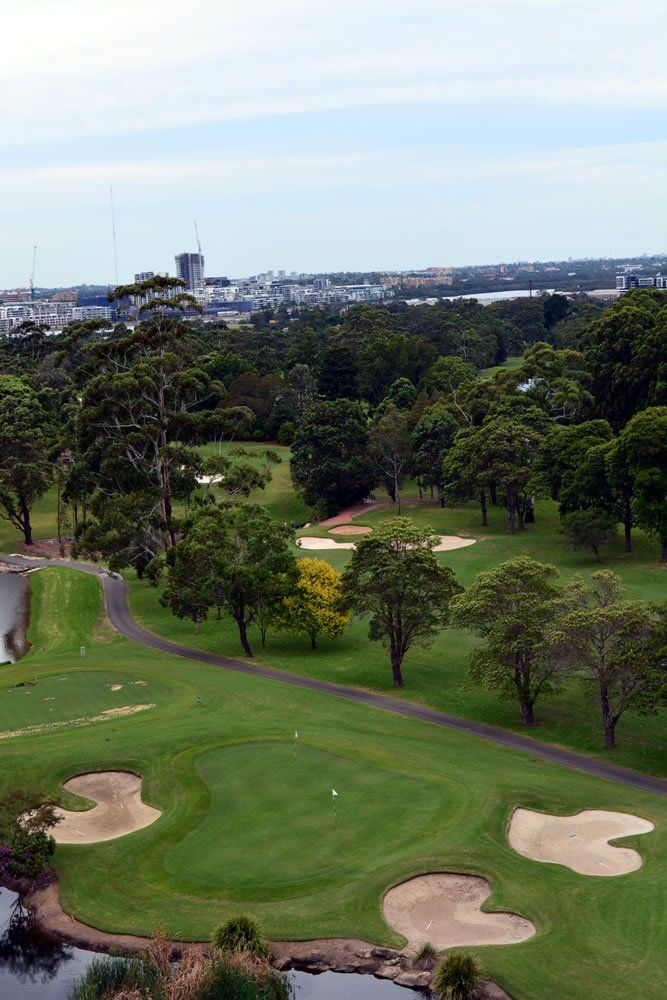
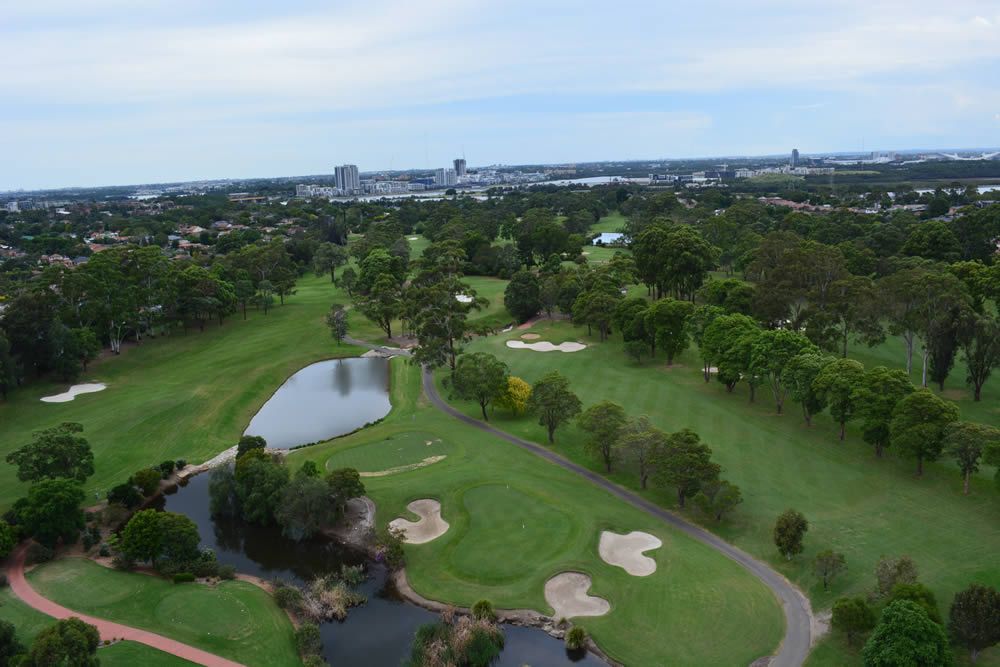
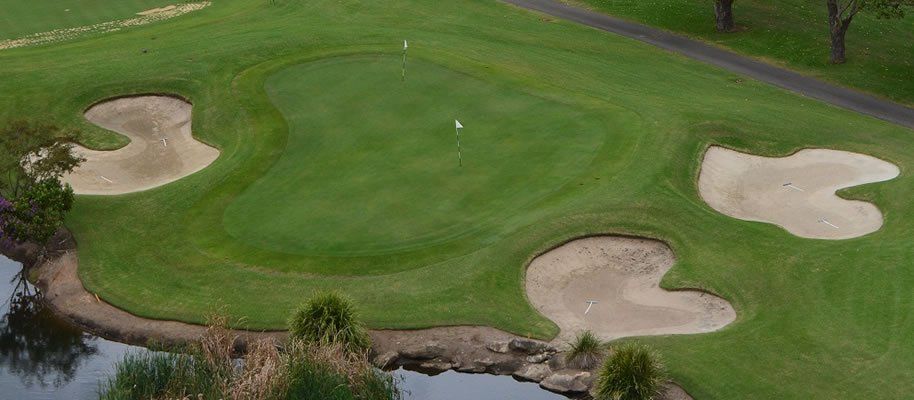
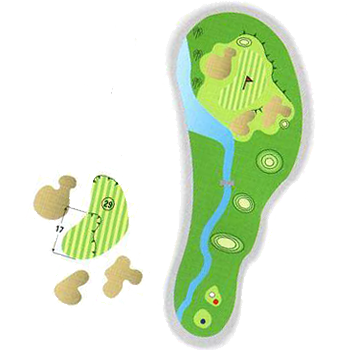
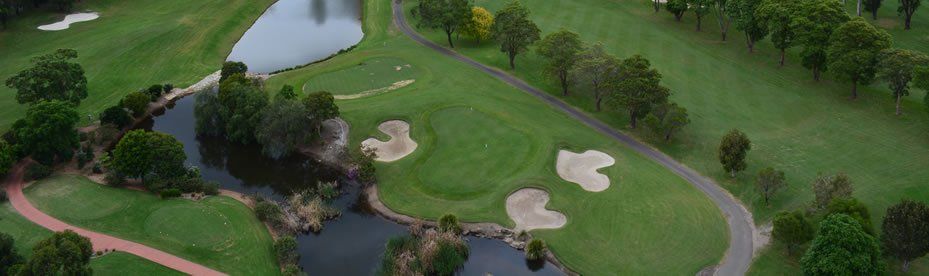
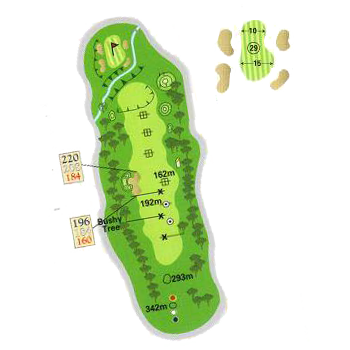
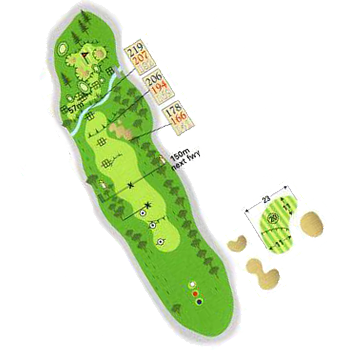
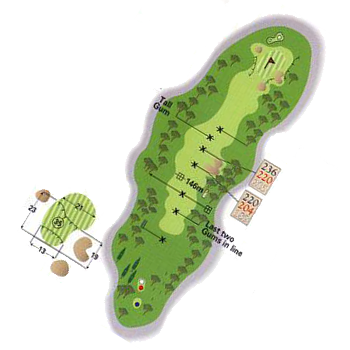
A difficult opening hole. The tee shot must be positioned to the right of the fairway bunker and to the left of the trees jutting out into the fairway to be in the go zone, otherwise a lay up is necessary.
The green is positioned just beyond a stream which also meanders to the right of the green and forms a difficult natural hazard. Bunkers surround the green left and right.
368m
356m
332m
Hole #2
Par 4
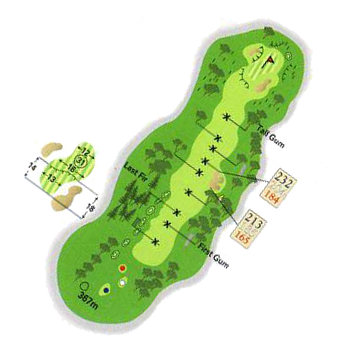
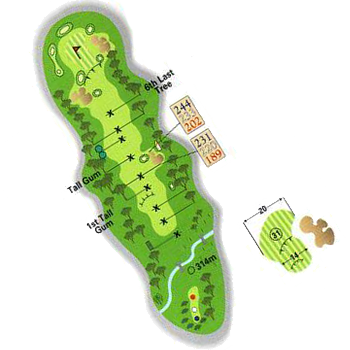
The second hole is a downhill slight dogleg to the left. A well-hit straight drive will land you in the right-hand bunker. The longer hitter will be able to fly this bunker leaving a short iron to the green.
The green lies across the line of the fairway and is guarded by well-placed bunkers in front and also behind.
357m
329m
309m
Hole #3
Par 4
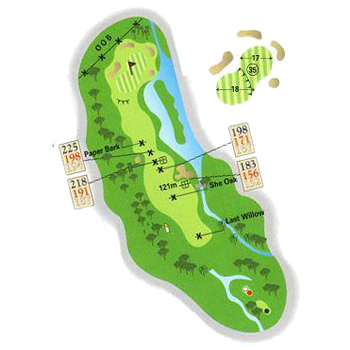
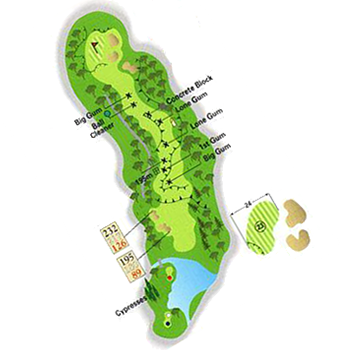
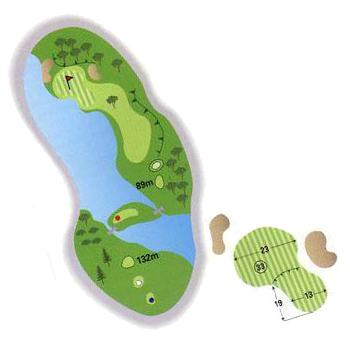
A challenging and intriguing hole with a number of different approaches possible to avoid the hazards. The hole has a stream running along the right-hand fairway edge, which then flows into a lake just behind the right-hand bunker.
From the tee it is possible to play a mid iron short of the right-hand bunker, or a long iron carefully placed short of the left-hand bunker or a driver over both bunkers. Any drive slightly right of centre will find a watery grave whereas a well hit drive left of centre will be rewarded with a short pitch to the green.
302m
275m
271m
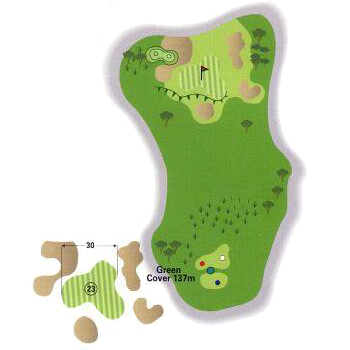
Hole #4
Par 3
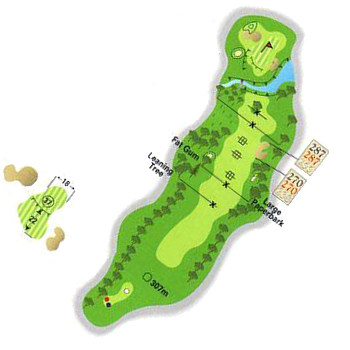
A challenge to hit this Par 3 green, it requires a well hit mid to long iron depending on the pin position. The green has Out of Bounds to the right and is guarded by bunkers front and right.
Anything hit left of the green will require a difficult recovery shot through the trees.
168m
131m
151m
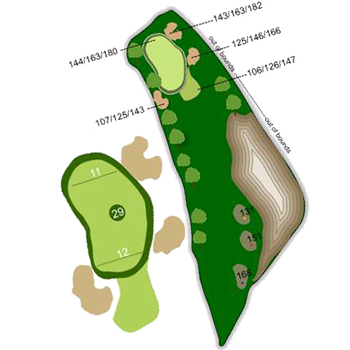
Hole #5
Par 5
This hole has been lengthened from its previous Par 4 status. Fairway bunkers force the player to direct his tee shot left of centre. This also helps to avoid the Out of Bounds to the right.
There are additional fairway bunkers to catch the second shot and also a large lone tree which guards the green against attempts to hit this green in two. However, two well-hit shots will reward the player with an eagle putt.
452m
437m
378m
Hole #6
Par 4
The drive must be carefully positioned right of centre to avoid downhill lies or worse still, getting wet in the lake to the left. Too far right will catch the fairway bunkers or even Out of Bounds.
The green is guarded by bunkers front right and left side and can test your putting skills with a number of "borrows" depending on the pin position.
380m
353m
365m (Par 5)
Hole #7
Par 3
The green is positioned on the side of hill and is slightly uphill from the tee. There is a stream that crosses the fairway midway between tee and green. This stream may pose a porblem for some members.
The green is aligned across the line of flight and any player hitting this green can be well pleased. There are deep bunkers short and right and also to the rear.
141m
135m
117m
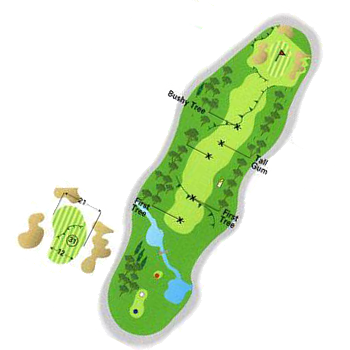
Hole #8
Par 4
A well hit driver may carry the stream crossing the fairway shown in the picture. Most players will opt for a mid iron from the tee to be short of the large fairway bunker on the right of the fairway.
The challenge on this hole is the difficult second shot to a narrow elevated green. Anything to the right will catch the deep bunker. Those bunkers on the left side of the green are a little friendlier.
306m
269m
294m
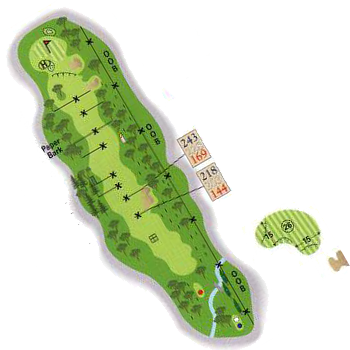
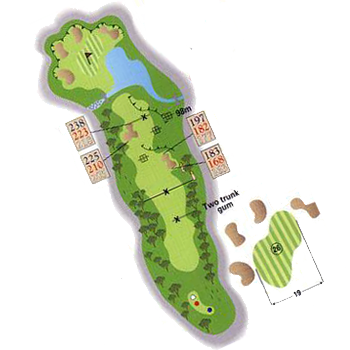
Hole #9
Par 4
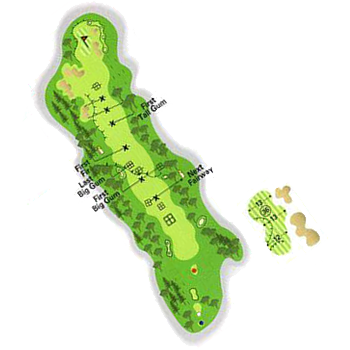
This hole is a slight dogleg left with high trees on the left hand side of the fairway. A well hit drive can catch the fairway bunker to the right hence a slight draw will bring the best result.
The slightly uphill second shot to the large green requires a well hit long to mid iron avoiding the bunkers to the right side and over the front left bunker.
391m
380m
349m
Hole #10
Par 4
From the tee it is important to position your drive at the turning point of this dogleg left hole. The player is slightly assisted by the shape of the fairway, which falls to the centre.
Your approach shot must pass over a stream crossing in front of the green and between the trees. The green is two-tiered and bunkered to the front right and rear.
389m
357m
389m (Par 5)
Hole #11
Par 5
This hole has been rated one of the best in Sydney. It requires firstly, a drive over a lake with longer hitters having to avoid hazards on both sides of the fairway.
Your second shot will be either a leteral grass valley or if you are tempted to hit further, a draw is required around the dog leg left, being careful to avoid the stream running down the left edge of the fairway.
The green is perched higher than fairway level and requires an approach shot with greater elevation to ensure it holds the green.
538m
523m
432m
Hole #12
Par 3
A crossover hole with the preceding 11th hole, both tee and green are elevated.
From the tee it is slightly downhill. The green has a large front deep bunker and bunkers to the rear left and right.
147m
129m
132m
Hole #13
Par 4
A straight tee shot between the two fairway bunkers will reward the player with a good line to the green.
Left centre, on the drive, short of the fairway bunker will provide more dry land to pass over to the green. If not, then it is a challenging approach shot over the lake to pin position that might be quite close to the water. Bunkers at the rear will capture any long shots.
325m
305m
310m
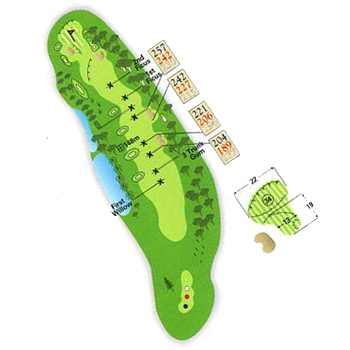
Hole #14
Par 4
The drive on the 14th hole must pass over a stream crossing the line of flight and then onto a raised fairway. The approach shot will be a mid to short iron to a green bunkered left and right.
354m
340m
273m
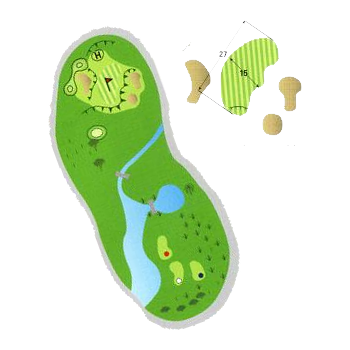
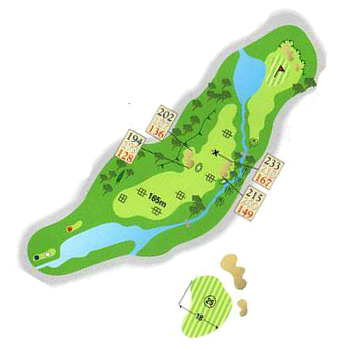
Hole #15
Par 4
There is a water carry to begin with and then the tee shot must be short of, or between fairway bunkers left and right.
As can be seen from the picture, the approach shot must avoid the lake on the left side of the green and bunkers on the right.
320m
305m
254m
Hole #16
Par 4
A well-positioned fairway bunker will catch a good drive and this bunker is by no means shallow. Your tee shot left of the centre will leave a mid to short iron approach shot uphill to a two-tiered green.
With a pin placement on the top tier, this is a demanding shot to reach the pin. A putt from the bottom tier can easily end up in three putt territory.
351m
330m
335m
Hole #17
Par 3
This is a daunting hole to say the least. Any tee shot must carry the full distance to the green unless the bail-out area to the right is preferred.
With a pin placement on the left side of the green, the player needs commitment and may even be pleased with a tee shot making the right hand greenside bunker.
168m
150m
102m
Hole #18
Par 5
This is a good driving hole with a left hand dog leg to commence with followed by a right hand dog leg for the third shot to the green.
There are fairway bunkers that restrict travel on the second shot and define the fairway extent.
542m
523m
438m
Hole #19
Par 3
This practice hole is full of its own little challenges. With a distance from tee to green of 114 metres, your short iron shot must pass over a stream and miss bunkers short, right and to the left.
114m
97m
102m